We are still actively working on the spam issue.
Power supply
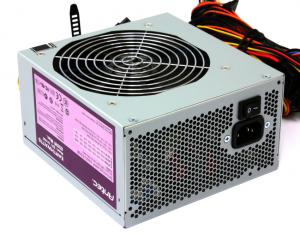
In home and office computing, a power supply is the component responsible for converting the alternating current from a wall socket into the low-voltage direct current required by devices like personal computers. At the time of this writing, all such devices are constructed to the ATX12V v2.x standard. Such units are equipped with a +3.3v rail, a +5v rail, at least one +12v rail, a -12v rail, and a +5VSB rail. For most system builders, only the amperage of the +12v rail or rails is of any great concern, since it only these rails that supply energy to modern video cards and CPUs. Considering its purpose, it should go without saying that a power supply is one of the more dangerous components found in a personal computer. A defective, overloaded, or poorly constructed unit has the potential to destroy the rest of your system or cause a house fire if it fails.
Contents
Connector types
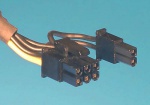
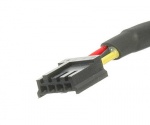
| Molex Mini-fit Jr. 5566-20A or 5566-24A | Molex 8981 Series | ATX12V/EPS12V | PCI-E 75 Watt | PCI-E 150 Watt | SATA | Berg |
|---|---|---|---|---|---|---|
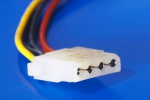
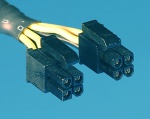
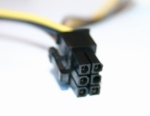
| This 20+4 pin connector is used to supply power to the motherboard. For older motherboards, only the 20 pin section is used. | This 4 pin connector is used to supply power to fans and most older drives. Compared to other connectors, it is easily damaged. | This 4+4 pin connector is used to supply power to the CPU. The 4 pin version is known as an ATX12V connector, while the 8 pin version is known as an EPS12V connector. | This 6 pin connector is used to supply power to graphics cards. | This 6+2 pin connector is used to supply power to graphics cards. Some modern cards use two, although doing so exceeds the PCI-E standard. | This 15 pin connector is used to supply power to modern SATA drives. | This antiquated 4 pin connector was used to supply power to 3.5 floppy drives. |
Rail voltages
To make sense of this section, it is necessary for reader to understand that Wattage is equal to the Voltage multiplied by the Amperage, and that the watt is the unit representing the rate of energy transfer.
The +3.3v rail
The +3.3v rail supplies power to chipsets, certain DIMMs, certain PCI/AGP/PCIe cards, and other miscellaneous chips.
The +5v rail
The +5.5v rails supplies power to hard drives, low-voltage motors, SIMMs, and certain PCI/AGP/ISA cards.
The +12v rails
The +12v rail or rails are especially important for system builders who plan to utilise high-end video cards, since such cards tend to have immense power requirements under load. Modern CPUs also draw their power from here through the motherboard's on-board voltage regulation module. An ideal unit should be capable of supplying nearly all of its advertised wattage to its +12v rail or rails. The maximum wattage on a given rail is equal to the voltage multiplied by the amperage. Remember that the amperage rating of a given rail represents the amount of current that it is rated to handle, but not necessarily the amount of current that the unit is capable of supplying to it. A desirable unit should be capable of supplying 80%-90% of its wattage to the +12v rail or rails.
At the time of this writing, both single and a multiple-rail configurations for the +12v source are common. In most multiple rail units, the individual +12v rails are derived by splitting a single +12v source into multiple outputs with each output receiving a limited capacity. Traditionally, the ATX12v standard required that the +12v rails be split up in this fashion for safety reasons, but this standard was eventually relaxed. As is the case with household wiring, the goal is to avoid overheating a single wire by limiting the amount of current that it must carry. Notably, units supplying 1000 watts or more often do have multiple +12v sources. In such units, the sources may be split up as previously described or combined into a single, high-energy rail.
For most system builders, the +12v rail count is a distinction without a difference. Within the gaming community, there exists a common belief that the monorail design is either objectively superior or that it at least simplifies load balancing. Both of these beliefs are devoid of merit. In the case of the former, the exact opposite is probably true due to the potential safety benefits mentioned earlier. In the case of the latter, it seems to primarily come of attempts to pair inadequate power supplies with high-end video cards. For a detailed analysis of +12v rail configurations, see Single vs. Multiple +12V rails: The splitting of the +12V rail.
Efficiency ratings
Power supplies are not perfectly efficient, meaning that the amount of power being drawn from a wall socket will be greater than that available to the system. Since power consumption tests are taken at the wall and are not always corrected for inefficiency, the actual power needs of a given system could be significantly lower than than the tests performed by some reviewer's might indicate.
Most power supply manufacturers participate in a voluntary certification program called 80 PLUS™. To be 80 PLUS™ certified, a unit must operate at a minimum of 80% efficiency under loads of 20%, 50%, and 100%. Efficiency in this case refers to the percentage of power actually delivered to components. An 80 PLUS™ certified unit with a rating of 600 watts for example would draw 720 watts from the wall at 100% load. The more efficient the unit, the lower its operating cost. Since they often include superior components, highly efficient units tend to have longer lifespans and higher retail prices.
There are several levels of 80 PLUS™ certification, as you can see in the following chart.
| 80 Plus test type | 115V internal non-redundant | 230V internal redundant | ||||||
|---|---|---|---|---|---|---|---|---|
| Fraction of rated load | 10% | 20% | 50% | 100% | 10% | 20% | 50% | 100% |
| 80 Plus | 80% | 80% | 80% | |||||
| 80 Plus Bronze | 82% | 85% | 82% | 81% | 85% | 81% | ||
| 80 Plus Silver | 85% | 88% | 85% | 85% | 89% | 85% | ||
| 80 Plus Gold | 87% | 90% | 87% | 88% | 92% | 88% | ||
| 80 Plus Platinum | 90% | 92% | 89% | 90% | 94% | 91% | ||
| 80 Plus Titanium | 90% | 94% | 96% | 91% | ||||
Unit selection
Power requirements
To ensure a long lifespan and accommodate the possibility of capacitor ageing, a power supply should be selected with the intention of operation at 80% or less of its maximum load . If over-clocking is planned, the increased energy requirements of the over-clocked components must be considered in this calculation. A decent might serve for as long as a decade if properly cared for, so future needs should be considered as well. This PSU calculator is an excellent tool for approximating a build's power requirements.
Cable configuration
Power supplies are available in both modular and non-modular configurations. Modular units offer detachable cables, allowing a system builder to simplify cable management by attaching only those cables required for a given build. Some units are fully modular, while others are partially so. In either case, cable management is simplified to such an extent that the difference can be considered largely academic. Modular cables may introduce some additional electrical resistance, but certainly not enough to represent a serious concern. Non-Modular units are more affordable and possibly longer lasting.
Cable length
Cable should be checked against the measurements of the case being used in the build, although this is only likely to be a concern with very large full towers. More importantly, the connectors offered by the unit should be checked against the motherboard, video card, and number of SATA drives being used in the build.
Brands and OEMs
An original equipment manufacturer or OEM is the firm that is actually responsible for the construction of a product. Firms like Channel Well, Delta, HEC, and Seasonic are examples of power supply OEMs. While OEMs do generally market their own lines, many also perform contract manufacturing for or market their products through firms like Antec, Corsair, and XFX. While build quality often varies wildly from one manufacturer to next, purchasing based upon brand loyalty is still not a good idea. A few brands popular on /g/ have been mentioned, but there are of course far too many to cover in this article. For a detailed examination of power supply brands, see Tom's Who's Who In Power Supplies: Brands, Labels, And OEMs.
Qualified reviews
Once a seemingly appropriate unit has been identified, it is necessary to vet it against qualified and detailed reviews. Unfortunately, this can be a problem in a world of paid reviewers and ignoramuses. JonnyGURU is quite reputable and offers detailed reviews of many units involving opinion, disassembly, and stress-testing.
Troubleshooting
A power supply can be cleaned safely, but it is not otherwise intended to be serviced by the user. Disassembly is an inherently dangerous undertaking, since a shock from its capacitors could result in hospitalisation or death. This risk can be mitigated by wearing electrician's gloves with leather over-gloves while performing any repair work.
Routine cleaning
Like most PC components, the power supply requires regular and thorough dusting with a pressurized air duster. If dust and pet hair are permitted to build up, the unit may eventually overheat, catch fire, or otherwise fail. Compared to most components, power supplies are especially prone to overheating-related failures. Keep in mind though that forced movement of the fan must be avoided to prevent damage to the bearings.
Fan replacement
Occasionally, a power supply's fan will fail long before the unit does. Should this occur, the unit can be saved by cutting power to it at once. Provided that the unit is still under warranty, the manufacturer should be willing to repair or replace it without voiding the warranty. If the unit is no longer under warranty, it can be repaired with the following procedures:
- Remove the unit from the PC and put it in a safe place. Do not disassemble it for at least 24 hours, since the capacitors should be allowed ample time to drain. Even without power, the charge in the capacitors is capable of inflicting serious injury or fatality.
- Locate a nearly identical fan. Do your research. The new fan must be compatible with the fan controller's voltage at idle.
- Open up the unit and check to see whether or not the fan's wiring is soldered to the PCB. In the majority of cases, it will be.
- If it is, unscrew the old fan and snip the fan's wires as close to the fan as possible. Care must be taken not to damage the solder.
- Braid the wire, exposing slightly more than one centimetre of metal.
- After deciding how long you would like the wire to be, do the same for the replacement fan
- Splice the wires together by crushing the ends flat with pliers, putting them together, and then twisting.
- Using electrical tape or liquid sealant rated for high temperatures, cover the spliced wires.
- Test the power supply. If anything should go wrong, deprive it of power at once.
External links
- Wikipedia's Explanation of the Watt (SI Measurement).
- Wikipedia's Explanation of the Volt (SI Measurement).
- Wikipedia's Explanation of the Ampere (SI Measurement).
- Single vs. Multiple +12V rails: The splitting of the +12V rail
- This is one of the few regularly updated tools for calculating power requirements.
- Tom's Who's Who In Power Supplies: Brands, Labels, And OEMs
- Anandtech offers various benchmarks, including idle and peak power draw, for a wide range of components.
- JonnyGURU is one of the few genuinely reliable PSU review sites.
- Realhardtechx has an interesting PSU review database. It makes finding reviews for specific units a bit easier than a basic search engine would.
