We are still actively working on the spam issue.
Difference between revisions of "VirtualBox"
m (Grammar) |
m (Add link to Virtual Machine) |
||
| Line 1: | Line 1: | ||
| − | [https://www.virtualbox.org/ VirtualBox] is a gratis virtualization system for [[Windows]], OSX and [[GNU/Linux]]. | + | [https://www.virtualbox.org/ VirtualBox] is a gratis [[Virtual Machine|virtualization system]] for [[Windows]], OSX and [[GNU/Linux]]. |
With it you can create a Virtual Machine, essentially having a "fake" computer running inside your actual computer. Your physical computer is termed the Host machine, and the virtual machines are known as Guests. | With it you can create a Virtual Machine, essentially having a "fake" computer running inside your actual computer. Your physical computer is termed the Host machine, and the virtual machines are known as Guests. | ||
Revision as of 04:52, 20 February 2022
VirtualBox is a gratis virtualization system for Windows, OSX and GNU/Linux.
With it you can create a Virtual Machine, essentially having a "fake" computer running inside your actual computer. Your physical computer is termed the Host machine, and the virtual machines are known as Guests.
It is possible to "snapshot" a virtual machine, allowing you to save and restore it's current state just as you can in a video game emulator or word processor.
You can run multiple virtual machines at once and even network them together.
Virtual machines are good for testing out operating systems, running network servers, sandboxing processes and experimentation.
Installation
Windows
Official installers can be found on the VirtualBox Downloads page.
During installation you may need to approve some VirtualBox drivers owned by Oracle. These are fine: go ahead and agree. You may also need to reboot after the install.
Once installed, shortcuts will be available in the Start Menu.
Linux
Your official package repositories will very likely contain VirtualBox. There may also be a separate package for the VirtualBox Guest Additions iso, which is handy to have if you're going to be creating Windows Guest machines.
After you install the package(s) you may need to load the vboxdrv kernel module ($ sudo modprobe vboxdrv) or add your user account to a virtual box users group. Refer to your distro's wiki for details.
Once installed, running "VirtualBox" (capitals required) from the command line or checking your Desktop Environment/Window Managers application menu will get you started.
Creating a Virtual Machine
Basic Setup
There are two steps in creating a usable virtual machine:
- Setting up the virtual machine, and
- Installing an operating system.
In this example we'll just be covering the setup of the machine and stop just short of installing the OS (Windows 7 and Linux Mint cover these topics).
Creating a Virtual Machine is done using a wizard in the VirtualBox Manager:
- Click the New icon in the toolbar to start the wizard (blue spikey ball icon).
- In the popup you name your new virtual machine. VirtualBox will try to guess what operating system you're going to use by analysing it's name. For this walkthrough, we'll use Linux Mint as an example.
- Enter "linux mint" as the name.
- VirtualBox will guess the Type as "Linux" and Version as "Linux 2.6 / 3.x (64 bit)".
- Have a click about to see the other options. 32bit and 64bit guest machines are possible (on a 64bit host) and plenty of Linux distros are named specifically, along with Windows, Mac OSX and BSD.
- With "Linux" and "Linux 2.6 / 3.x (64 bit)" selected, hit Next.
- On the memory size screen you can specify how much of your Host machine's RAM is to be allocated to this Guest machine. VirtualBox will default to a minimal amount of ram (256Mb for Linux) and you will want to allocate more (1024mb is good). Allocating less is generally a bad idea unless you have a reason to.
- Hit Next.
- On the first Hard drive screen you can specify what kind of hard drive to give your Guest machine. The options are:
- Create a virtual hard drive now (default): Probably what you want.
- Use an existing virtual hard drive file: Let's you import another Guest hard drive to this Guest machine.
- Do not add a virtual hard drive: For use only if you have a good reason.
- With "Create a virtual hard drive now" selected, hit Create.
- Next are the options for the type of our Guest hard drive. VDI (the default) is fine.
- This screen is not for selecting the intended filesystem (NTFS, ext4, etc) but for the format of the Guest hard drive.
- It's mostly for compatibility with other virtualization systems, such as VMWare.
- With VDI selected, hit Next.
- Now a choice to Dynamically allocate (default) the Guest hard drive as required, or use a Fixed Size.
- Dynamically allocated still has a maximum size, but it is created as required (e.g. if the Guest machine is only using 2gb of an 8gb hdd space, it's file on the Host will be 2gb).
- Fixed size creates the entire drive in full right now (e.g. if the Guest machine is only using 2gb of an 8gb hdd space, it's file on the Host will be 8gb).
- With "Dynamically allocated" selected, hit Next.
- Finally, options for the maximum size and name of the Guest hdd. Linux Mint and Windows 7 need at least 10gb for an install. Set it to 15gb or more and hit Create.
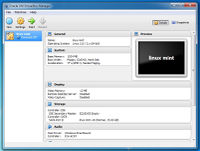
Now you'll be back in the VirtualBox Manager and your new virtual machine will be over on the left hand side and it's details will be displayed.
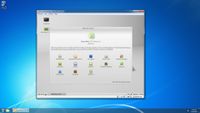
Before you power it on, you may want to put your operating system install .iso in it's Guest optical drive. You'll also want to know how to uncapture the mouse and keyboard from the Guest machine (hit the right Control key on your phsyical keyboard):
Inserting the Operating System Install Disc
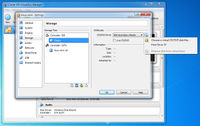
With your virtual machine selected, hit the Settings icon on the toolbar, and:
- Select the Storage category.
- Select the "Empty" IDE Controller with the picture of a CD.
- On the right, under Attributes, click the other CD icon for CD/DVD Drive.
- In the dropdown menu, select Choose a Virtual CD/DVD disk file.
- Locate and select your .iso
- Hit OK to you virtual machine's Settings screen.
You're now ready to power on your virtual machine and install your operating system.
Guest Additions CD for Windows Guests
If you're running a Guest Windows machine, you may want to install the VirtualBox Additions software within it to allow for proper fullscreen, drag and drop, shared folders and so on. You'll need to have the VirtualBox Guest Additions Iso available on the Host machine first:
- On Windows, it can be downloaded from Official VirtualBox Downloads page (it's under "Extension Pack").
- On Linux it will be in your package repositories. See your distro's wiki if you can't find it.
With the Host prepared and your Guest running, select the Devices menu in the Guest's window and hit "Insert Guest Additions CD Image...". The Windows Guest will now see a CD with a VBoxWindowsAdditions-(x86/amd64).exe file. Run it, accept the detaults, and allow the Windows Security alerts about Oracle System Devices through. It'll want to reboot once it's done. Let it.
Advanced Virtual Machine Configuration
Beyond the basic wizard setup, there are plenty of extra options available in your virtual machine's Settings window.
Video
- You can toggle fullscreen on the Guest by hitting Right Control + F.
- VNC stye Remote Display is under Display, Remote Display.
- You can video capture the Guest under Display, Video Capture.
Virtual Hardware
- Extra Processors can be added under System > Processor. This requires certain options enabled under the Host's BIOS.
- Extra HDDs are added under Storage.
- USB devices plugged into the Host machine can be sent straight through to the Guest machine under USB.
Networking
Basic Guest networking comes in four main flavours:
- NAT (default), where the Guest will have it's own IP address have internet access.
- Host Only adapter, which allows communication with the Host and other Guests on the Host, but no external network access (i.e. no internet).
- Bridged, which uses the Host NIC directly and you don't want.
- Internal Network, for advanced stuff like software defined networks among VMs.
Guest and Host Interaction
- Sharing your Guest and Host's Clipboard and Drag and Drop functions are under General, Advanced. You can share only from Guest to Host, the opposite, or both. Works for Windows Guests with the Guest Additions installed.
- Sharing folders/directories can be done under Shared Folders. Use the tiny blue folder with green plus icon over on the far right.
- Shared folders can be set to Read Only for the Guest.
- Shared folders will appear on Windows Guests under My Computer and on Linux Guests under /media/.
- Automounting will keep folders shared across Guest reboots.
Snapshots and Rewinding
Snapshots allow you to save the state of a Guest machine at a point in time and revert to it later. You can have multiple snapshots and branching versions of a Guest's history (think of Back to the Future's different timelines).
Snapshots capture both the disk and RAM status of a virtual machine. They are also pretty clever in how they store these changes to the machine, so you won't have to worry about a 25gb Guest hdd image being written multiple times to the Host.
Taking a Snapshot
Take a snapshot via the Machine menu in the Guest's window. Name it well.
Reverting to a Snapshot
- Power off the Guest machine.
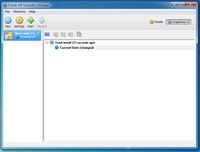
- Select the Snapshots view in the VirtualBox Manager (top right).
- Select your desired Snapshot.
- Hit the Revert icon (folder with blue U-turn arrow).
- You'll be prompted for a name to describe the VM's current state (which becomes another snapshot).
- Start your VM back up.
Troubleshooting
Help! I'm Trapped Inside the Guest Machine!
- Press the right Control key on your physical keyboard. This will release your mouse and keyboard back to the Host machine.
- Right Control + F will get you out of full screen mode.
64bit Guests Won't Run!
You need to have VT-x enabled in both the Guest Settings (System, Acceleration) and the host's BIOS.
I Can't Ctrl-Alt-Delete!
Right Control + delete will send a Ctrl-Alt-Delete to the Guest. It's also available through the Machine menu in your Guest's window.


